Step-by-step Guide: Deploy your static site from GitHub to Netlify

This is a beginner’s guide to how to deploy a static website from GitHub to Netlify.
Netlify is a service which provides an easy way to deploy the static sites from GitHub or GitLab or Bitbucket. Moreover, it’s free (unlimited projects) for one user. Best fit for personal websites.
In this tutorial, I will explain how to host a site on Netlify from a GitHub repository. I assume you have a repository in GitHub. If you do not have any, fork my repo from here.
If you are new to Git, follow this amazing tutorial from product.hubspot.com. or the basic guide by Abhishek Joshi from here.
Signup and Login to Netlify
Let’s start with creating an account in Netlify. As we are hosting our site from GitHub, it’s recommended to signup with GitHub account.
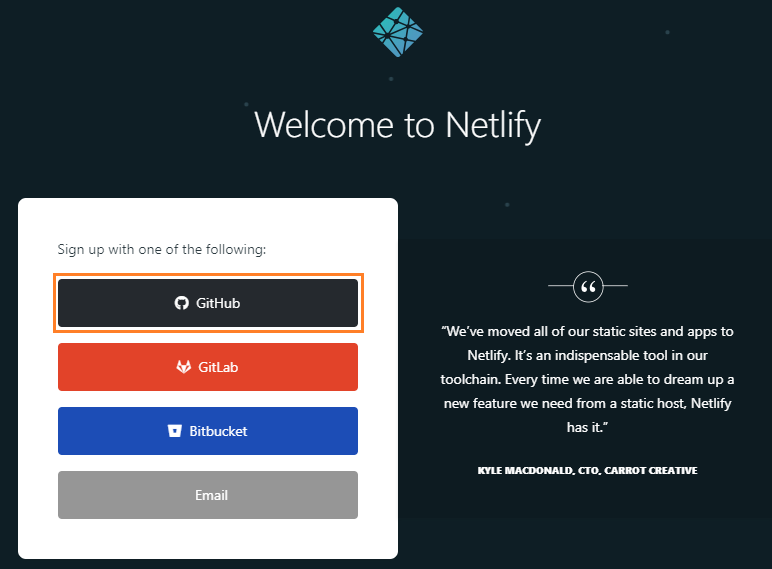 Netlify Signup with GitHub account
New site from GitHub
After Signup, Login to Netlify with GitHub account. On the Home page you can see a button to Create New site from Git.
 Create New site from Git button on Home Page
Click on New site from Git button. On the next page, you can see the option to connect to GitHub to fetch the repositories.
 Connect to GitHub
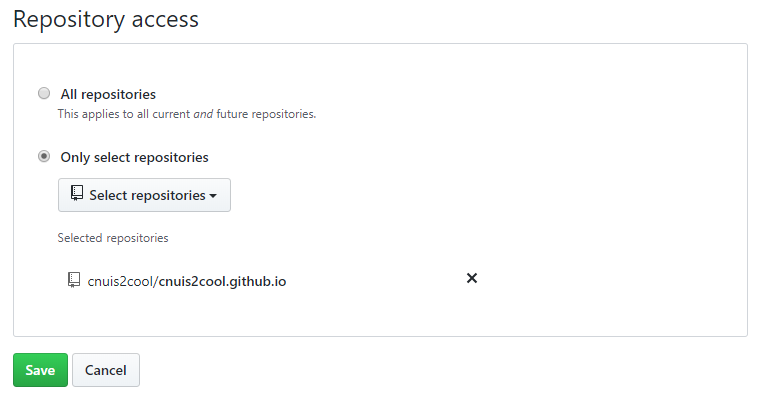
Configure a repository for Netlify
Authorize with GitHub. As we haven’t yet configured any repositories for Netlify, they will be listed here. Now configure a new repository by clicking on Configure the Netlify app on GitHub.
 Pick a GitHub repository
You will be navigated to your GitHub account. There you can select the repositories of your choice. Select the repository from the dropdown and click on Save.
Deploy Site
Now the selected repo will be listed in Netlify. Click on it to deploy the site.
 Repositories configured for Netlify
Leave the options and click on Deploy Site
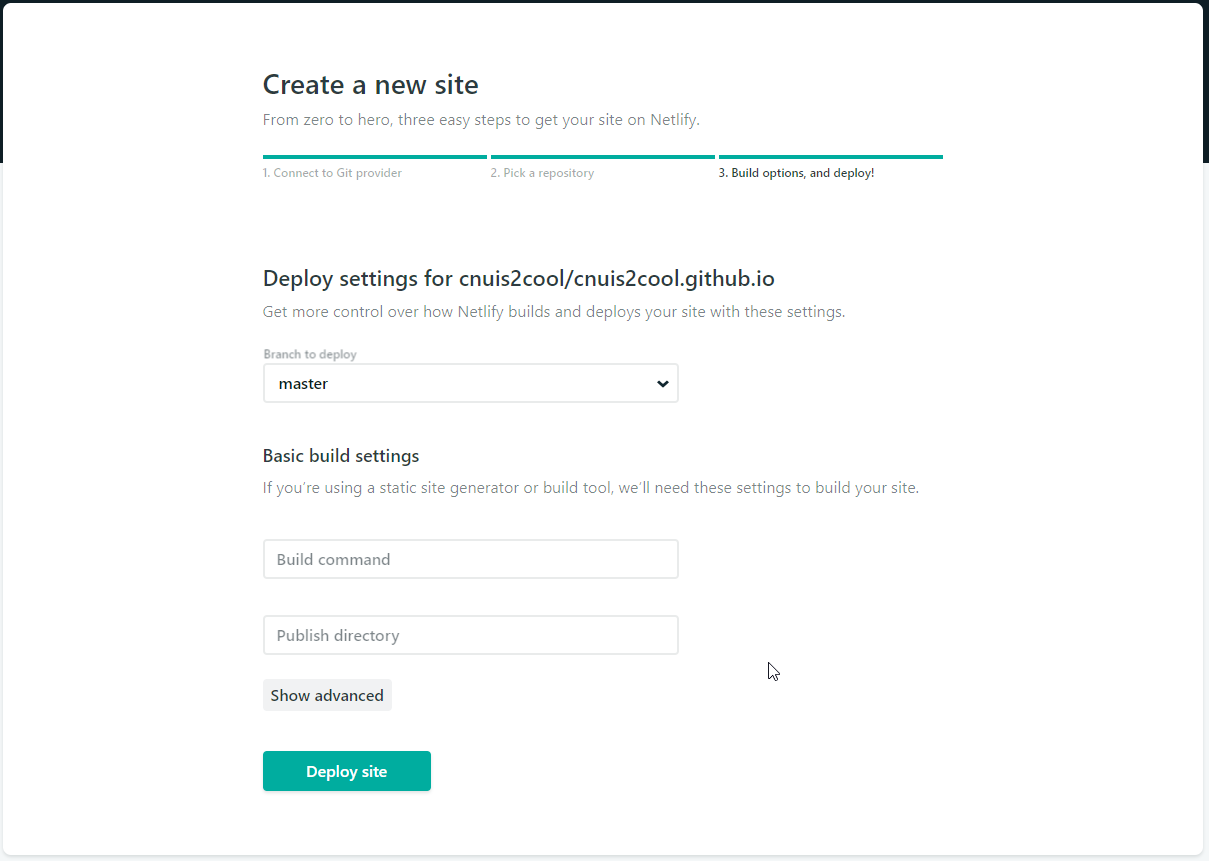 Deploy site
Congratulations! You have just deployed your first site on Netlify! The site will have a random name. Click on the hyperlink (URL ending with netlify.com) to browse the site.

Rename site
Click on Deploy settings and then click on General in the left panel. Click on Site details. Now you can see the site information in the right panel. Now click on Change site name to rename the site.
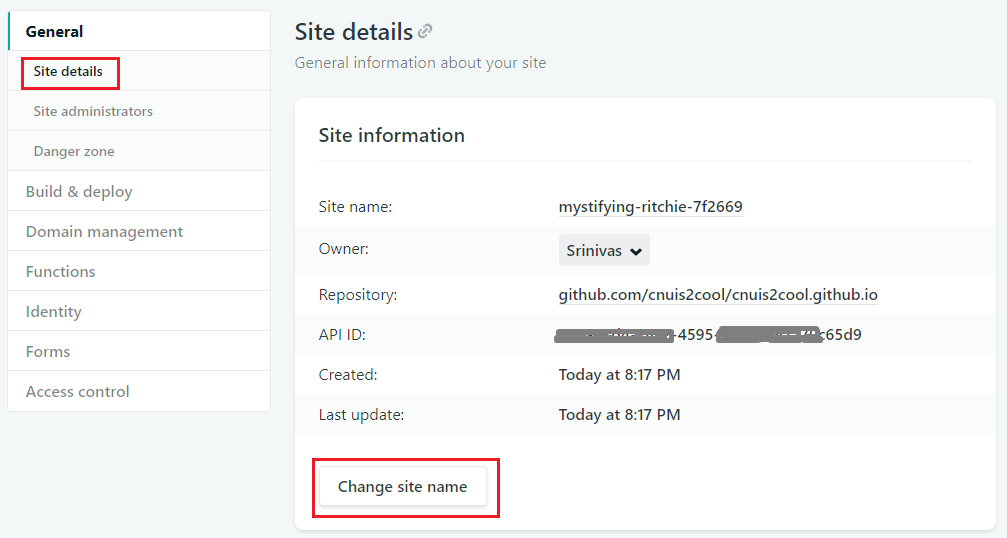 Site details page
Rename the site to the desired name.
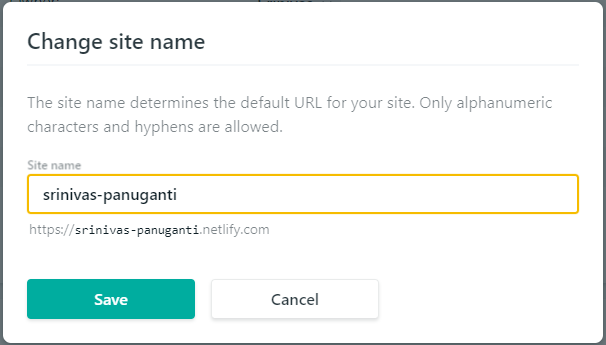 Rename site
Continuous Deployment
Whats more, every time you push a new commit, Netlify updates the site on-the-go. Super Cool right?
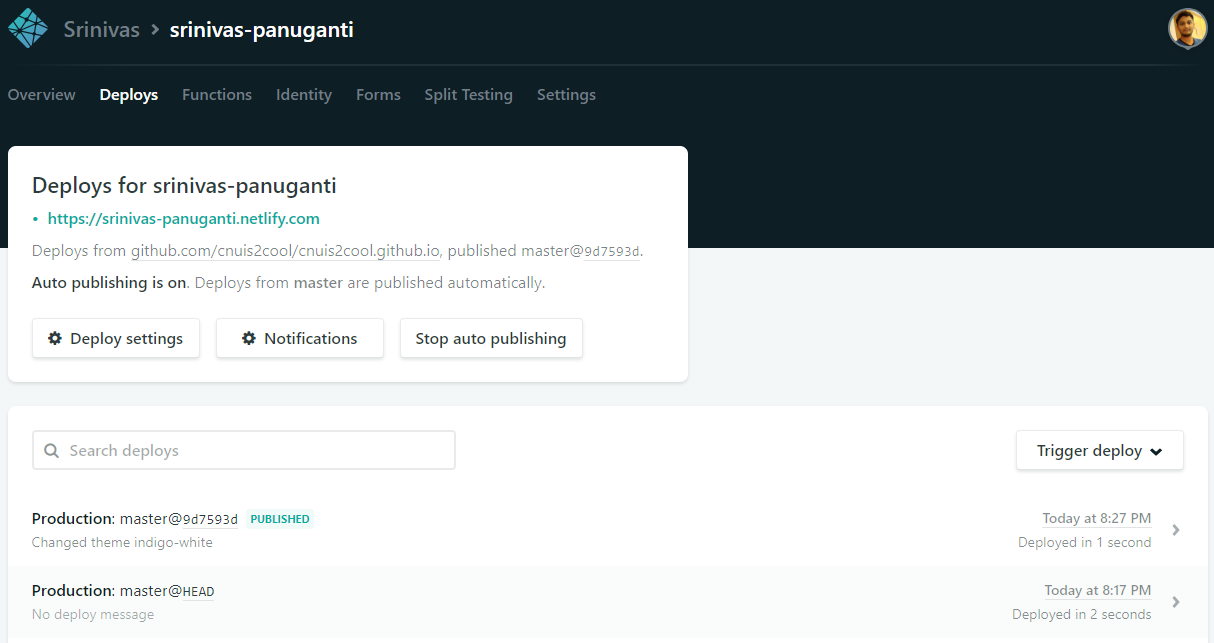 Live updates
Live site
Here is My dev Landing Page hosted with Netlify.
 My dev landing page live at Netlify
Hope it helps you!!
Originally published at Medium


